Hey there! If you’ve ever held a smartphone, a laptop charger, a wireless earbud case, or even the tiny plastic buttons on your TV remote, you’ve got something made by injection molding. As the go-to supplier for Electronic & 3C injection molded parts, I get questions all the time from designers, engineers, and even small startup owners who’re new to this process—like, “Wait, how do those precise, often tiny plastic parts for electronics actually get made?” It’s not just shoveling melted plastic into a mold, I promise. There’s a lot of science and finesse behind it, especially when we’re talking about parts that go into devices that need to work for years, no overheating, no cracking, no weird gaps. Let me break it down like I’d explain it to a friend who’s got no background in manufacturing. Electronic & 3C Injection Molded Parts
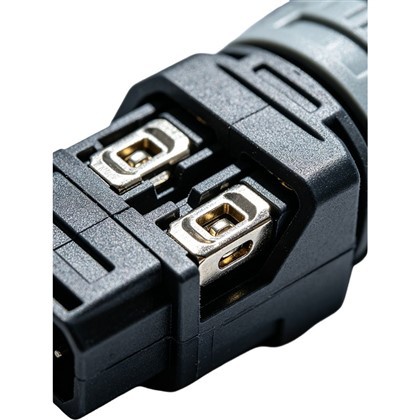
First, let’s start with why injection molding is the backbone of 3C (that’s computers, comms, consumer electronics, for anyone who’s not deep in the space) parts. You see, electronics parts need to be super consistent—one tiny earbud hinge or a laptop battery casing can’t be slightly bigger or smaller than the last, otherwise it won’t fit right, or worse, it’ll jam a circuit. Injection molding cranks out thousands (even millions!) of identical parts, fast, and with tolerances tight enough to fit next to tiny circuit boards. No other manufacturing method does that for this kind of volume without costing a fortune, especially for complex parts with little details like snap fits or sensor cutouts.
Okay, so how does it actually work, step by step? Let’s walk through it like we’re standing right next to one of our presses, watching it run. First off, before we even hit “go,” there’s a ton of prep. That starts with the mold itself—we don’t just buy a generic mold. Every part is custom-made. We work closely with our clients’ design teams (usually mechanical or industrial engineers) to tweak their CAD files, because not all designs play nice with injection molding. For example, that super thin, curvy smartphone frame they wanted? We might suggest a tiny draft angle on the sides so the part doesn’t get stuck in the mold when it cools, or a small rib on the inside to add strength without making the plastic thick (thick plastic cools unevenly and causes warping—big no-no for electronics that need to fit flush). Then we machine the mold from tool steel or aluminum, polished to a mirror finish for parts that need to look good (like a glossy wireless charger cover) or matte for parts that don’t show fingerprints, with tiny channels for cooling water and a “gate” where the melted plastic will pour in.
Next up, the material. This is where most people get confused—we don’t just use random plastic. For 3C parts, we pick specific thermoplastics, because they melt when heated and solidify back to plastic when cooled, perfect for injection molding. For example, if we’re making a heat-resistant laptop battery casing, we’ll use polycarbonate (PC) or PC/ABS blend—those can handle high temps without melting or warping. If it’s a tiny connector housing that needs to be super rigid, maybe nylon with a bit of glass fiber added. And for parts that need to be durable, like a remote control’s button, we might use TPE (thermoplastic elastomer) so it’s soft to press but still holds up after thousands of clicks. We also have to make sure the material has no impurities—even a tiny speck of dust in the plastic can leave a blemish on a $100 phone screen part, so we dry the pellets first (some plastics absorb moisture like a sponge, and if you melt wet plastic, it’ll create tiny bubbles that weaken the part).
Now, the main event: the injection molding cycle. This is the part that happens in just a few seconds per part. First, we load the dried plastic pellets into the hopper on the injection molding machine. The pellets fall down into a heated barrel, which has a big screw that spins. The barrel is heated to like 180–300°C, depending on the plastic we’re using—hot enough to turn the hard pellets into a thick, syrupy liquid, but not so hot that it burns (burnt plastic leaves black spots and stinks, we’ve messed that up once or twice, lesson learned). When the plastic’s ready, the screw stops spinning and pushes forward like a plunger, shooting that melted plastic through a nozzle into the mold cavity. Remember that gate I mentioned earlier? That’s where the plastic enters the mold. For small, precise parts, we use tiny gates (like pin gates) so the leftover plastic “sprue” is minimal and easy to snip off later, no mess.
Here’s the tricky part we have to get right every time: packing and holding. Right after the plastic fills the mold cavity, we don’t just stop. We keep a little pressure on the screw, pushing more melted plastic into the cavity as the first layer cools and shrinks. Plastic shrinks as it cools, especially thick areas, so if we don’t pack enough, parts will have sink marks—those little dents on the surface, like an apple that’s been squeezed. Sink marks are a huge problem for electronics because they don’t just look bad, they can cause parts to fit poorly or add stress that makes them crack over time. The packing pressure and time depend on the part size and material—we adjust this for every job, usually doing small test runs first to get it perfect.
Then comes cooling. Once the mold is full and packed, we send cold water through those channels I mentioned earlier, running through both halves of the mold (the core and the cavity, for you mold nerds). The plastic has to cool all the way through, solidifying enough that we can open the mold without the part bending or deforming. Cooling time is a big factor in how fast we can make parts—too fast and the mold can crack, too slow and we’re wasting time and money. For tiny 3C parts, cooling might take 5–15 seconds; for bigger parts like a laptop chassis, it could be 30 seconds or more. We also use simulation software sometimes to map out how the plastic will flow and cool, so we don’t have to waste hours tweaking in real life.
Finally, ejection. The mold opens, usually the core (the side that forms the inside of the part) stays on the machine side, and we use tiny ejector pins—little metal rods that push the part out of the core. For parts with delicate features, we have to be super careful here—too much force and we’ll break a tiny snap fit or scratch a glossy surface. Once the part is ejected, it goes to our quality check station, where we look for defects: sink marks, air bubbles, flash (extra plastic along the edges), wrong dimensions. We also do function tests sometimes, like if it’s a button, we’ll press it to make sure it clicks right, or if it’s a connector, we’ll test how well it fits with its matching metal part. After that, the leftover plastic (sprue and runners, the bits that ran through the mold channels) gets recycled or reground if it’s clean enough, which is good for the environment and cuts down on waste.
Wait, but what makes 3C electronic parts different from, say, a plastic toy or a backyard chair? Oh, so many things. For one, the tolerances are way tighter. A toy car wheel can be off by a few tenths of a millimeter and no one will care, but a smartphone’s internal frame has to be within 0.02mm of the design—if it’s even a little off, the camera module won’t line up right, or the screen won’t seat properly. We use coordinate measuring machines (CMMs) to check parts, tiny calipers that measure hundreds of points across the part to make sure it’s spot on.
Another big thing is material compliance. 3C parts go in devices that people carry around, sometimes in their pockets or near their faces, so we have to use materials that are safe, meet global standards like RoHS (no harmful chemicals like lead or mercury) and REACH. We also have to make sure the parts can handle the conditions they’ll face: heat from a phone’s CPU, cold when you take your laptop outside in winter, drops from waist height. We do pre-production tests too—thermal cycling (heating and cooling parts over and over) to make sure they don’t crack, drop tests to check for impact resistance, even UV testing if the part is on the outside of a device that gets sunlight.
And then there’s overmolding, which is a super common trick we use for 3C parts. Ever wonder why some earbud cases have a soft, grippy side, or why your charger plug feels rubbery? That’s overmolding—we inject two different plastics into the same mold in one cycle. First, we inject the rigid plastic for the main case, then we rotate the mold (or move the part to a second cavity) to inject the soft TPE over a specific area. That eliminates the need for adhesives or extra assembly steps, which is cheaper and makes the part stronger—no chance of the soft layer peeling off later. We do a lot of overmolding for consumer electronics; it’s how we make those nice, tactile buttons or grip areas that make devices easier to use.
I’ve seen a lot of people in the 3C space try to cut corners on injection molding, and it never works. Like, one client a while back wanted a really thin, sleek smartwatch casing, and their first design had super sharp corners. We tried to explain that sharp corners would cause stress in the plastic, leading to cracking when the watch is dropped, so we suggested rounding the corners just a tiny bit. They refused, tried the cheap mold, and within a week they had a batch of cracked casings that were useless. Now they come to us for every new part, because we don’t just push through what the design says—we know how to make parts that actually work.
Speaking of parts, we handle everything from tiny, 1mm-tall connector pins (you can barely see them with the naked eye) to full laptop chassis that are a foot long. No job is too small or too complex, as long as the design is feasible. If you’re a startup working on a new gadget, or a big manufacturer looking to source more consistent, cost-effective 3C parts, we’ve got the tools and the experience to help. We don’t just make parts—we work with you from the design stage, tweaking things to make them moldable, testing for quality, and delivering parts on time, every time.
If you’re a designer or procurement person tired of dealing with parts that have defects, long lead times, or inconsistent quality, hit us up for a chat. We can walk through your project, give you a quote, or even help refine your design if you need it. No hoops to jump through, no sales pitches, just people who know injection molding and 3C parts inside and out.
Connector Plastic Components References
- Rosato, D. V., & Rosato, M. G. (2000). Injection Molding Handbook. Kluwer Academic Publishers.
- Williamson, B. (2018). Injection Molding Basics for Consumer Electronics. Journal of Manufacturing Processes, Vol. 32, pp. 456-463.
- International Organization for Standardization. (2021). ISO 10993, Biological Evaluation of Medical Devices (relevant for 3C materials with skin contact).
- The Society of Plastics Engineers. (2022). Injection Molding for Precision Components. SPE Manufacturing Engineering Division.
- RoHS Directive 2011/65/EU. (2011). Restriction of Hazardous Substances in Electrical and Electronic Equipment.
Modelon Precision Industry (Suzhou) Co., Ltd.
With abundant experience, we are one of the most professional electronic & 3c injection molded parts manufacturers and suppliers in China. Welcome to buy customized electronic & 3c injection molded parts at competitive price from our factory. If you have any enquiry about pricelist, please feel free to email us.
Address: 1st Floor, Building 22, No. 2628 North Gate Road, Kunshan City, Jiangsu Province, P.R.China
E-mail: jessica_huang2025@163.com
WebSite: https://www.modeloncn.com/
