Let me cut to the chase—if you’ve ever spent thousands on a professional soundproof enclosure, only to find it’s still letting in too much workshop noise or bleeding audio out when you’re recording, you’re not alone. For the last 7 years, I’ve run a soundproof enclosure supply business, and I’ve fielded the same frustrated call a hundred times: “My supposed ‘soundproof box’ isn’t doing what it’s supposed to.” Most of the time, the issue isn’t that the enclosure was built wrong—it’s that it was set up or modified incorrectly, or key performance-boosting layers were skipped during the final fit-out. This post is the no-BS, science-backed guide we share with every client before they take delivery of our enclosures, tailored to fix that gap between “off-the-shelf box” and “fully functional soundproofing.” Soundproof Enclosure

First, let’s get one basic rule straight: soundproofing isn’t just about thickness. It’s about stopping airborne sound (from drills, traffic, studio monitors) and structure-borne sound (from vibrations that travel through walls, floors, or ceilings) from leaking in or out. A lot of cheap enclosure kits skip structure-borne sound control, which is why you’ll hear a hum from a nearby HVAC unit even if the walls feel solid. That’s the first win we focus on for clients looking to upgrade their enclosure’s performance.
Start with the gaps—90% of sound leaks don’t come through the solid walls, they come through cracks. Think of it like a window with a broken seal: a 1mm gap can let as much sound through as a 10cm thick solid wall. When we design our enclosures, we use compressed EPDM gaskets on every door, panel joint, and any opening for cables or wiring, but almost every client tweaks their enclosure on delivery and accidentally narrows or warps those joints. The fix here is simple, and it doesn’t cost much: when you set up your enclosure, take a cheap acoustic sealant (not regular silicone, which is porous to mid-range sound) and run a bead along every exposed joint. Don’t overdo it—you want to fill the gap, not squeeze excess out onto the frame. For cable penetrations, don’t just drill a hole and feed the wire through. Use a grommet with a flexible rubber seal, then stuff any empty space around the wire with acoustic foam strips or weatherstripping tape. We once had a woodworker client who drilled a hole for his power tool cord, skipped the seal, and wondered why his saw’s high-pitch whine was escaping to the neighbor’s shop. Fixing that grommet cut his noise output by 12dB in a week, no other changes needed.
Next, fix the structure-borne sound. This is where most off-the-shelf enclosures fall flat. If your enclosure is sitting directly on a concrete floor, or even worse, mounted to the same wall as your workshop’s main equipment rack, every vibration from a drill or a guitar amp will transfer through the frame into the building, or even into the enclosure itself, muddying the sound inside. For our clients, we recommend two options here, depending on use case. If it’s a recording or listening enclosure, we supply rubber vibration isolation pads (rated for 50Hz to 2kHz, the frequencies that carry most vibration) that you place under each corner of the enclosure. If it’s a heavy-use workshop enclosure (for saws, sanders, or 3D printers), we recommend building a 2-inch tall raised platform for the enclosure, filled with sand, then covering it with MDF. The sand acts as a vibration damper—even if the enclosure frame vibrates, the sand absorbs the energy before it travels to the floor. I’ve tested this with our prototype enclosures: a standard enclosure on concrete will let 20% of external vibration transfer through the frame; add the sand platform, and that drops to less than 3%. It’s a small change that makes a massive difference for both internal clarity and external noise compliance.
Now, the walls themselves—you might think adding another layer of drywall or foam is the solution, but that’s often a waste of money if you do it wrong. A common mistake I see is slapping thick acoustic foam directly on the inside of enclosure walls. Foam does absorb echo (reverberation, which is the sound bouncing around inside the box), but it does almost nothing to block sound from passing through the wall itself. For performance, you need two layers here: a barrier layer and an absorption layer, and they need to be separated, not stacked. Wait—separated? That sounds counterintuitive, but it’s a basic acoustics principle called decoupling. If you attach both layers directly to the same frame, the inner layer will vibrate with the outer layer, and sound will pass right through. For our enclosures, we build the frame with 1-inch gaps between the outer wall and inner wall, and we install resilient channels (thin metal strips that isolate the inner wall from the frame) to stop vibration transfer. If you’re retrofitting an existing enclosure, you don’t have to rebuild the frame: attach resilient channel strips to the inside of your existing walls, then screw a new layer of drywall (we use 5/8 inch type X drywall, which is denser than standard drywall) to the channels, offset from the existing wall’s screw holes. Then, fill the 1-inch gap between the two walls with fiberglass insulation rated for mid-to-high frequency sound. The insulation doesn’t block sound, it absorbs the sound that leaks through the barrier layers, so it doesn’t bounce around inside the enclosure. And skip the acoustic foam on the inner walls—save that for your ceiling (more on that in a minute) or for specific echo hotspots, like corners where sound waves stack.
Doors are another weak spot. Most enclosure doors are just a slightly thicker panel with a seal, but for heavy use or critical audio recording, you need to upgrade the seal and add a second door if possible. A single door can let in 15-20% of sound if the seal isn’t compressed evenly. The fix here is to use a door latch system that applies even pressure across the entire door frame. A lot of clients use standard cam latches, which only tighten at two points; replacing them with a multi-point latch (we sell these as an add-on for our enclosures) compresses the gasket along the whole door, eliminating gaps. For professional recording or industrial testing applications, we also recommend a double-door system, where the two doors are set 12 inches apart, and the space between them is filled with insulation. This is called a sound lock, and it reduces sound transfer by an extra 10dB, because sound has to pass through two sets of seals and the insulated gap. I worked with a audio mastering studio last year that had a single-door enclosure; adding the multi-point latches cut their internal echo by 8dB, and the double-door upgrade made it so they could record drum tracks at 2 a.m. without their neighbors calling the cops.
The ceiling is often ignored, and that’s a mistake. Sound travels upward, and ceiling reverberation is one of the biggest causes of poor internal sound clarity. Most enclosures have a rigid, flat ceiling that reflects sound straight down, creating echo. The fix here isn’t just to add foam—you need to make the ceiling absorb sound and stop structure-borne vibration. First, decouple the ceiling from the walls: instead of attaching the ceiling panels directly to the top of the enclosure walls, hang it from the frame with spring hangers, the same way you’d hang a suspended ceiling in a home theater. Then, fill the ceiling cavity with dense fiberglass insulation, and cover it with a layer of fabric-wrapped acoustic panels, not foam. Fabric panels absorb low-frequency sound, which foam doesn’t handle well, and they’re more durable for heavy use workshops. For a woodworking client of ours, swapping their rigid ceiling for a hung, insulated acoustic ceiling cut the internal echo time (the time it takes for a sound to die down) from 1.8 seconds to 0.5 seconds—meaning their cuts and sanding sounded clear, not muddy and distorted.
One final tip that a lot of clients don’t think about: the air inside the enclosure. If your enclosure is completely sealed, with no ventilation, the air itself can carry sound. If you have a fan or HVAC system, or even just a gap for air circulation, that’s a weak point. The solution here is a passive ventilation system with sound attenuation, not a open hole. We use vent silencers for our enclosures—these are long, narrow ducts lined with insulation that run through the wall, so sound has to bounce along the duct instead of passing straight through. For small enclosures (like those for audio equipment), a 12-inch vent silencer cuts sound transfer by 15dB, which is almost as much as adding an extra layer of wall. Never just cut a hole and cover it with a mesh—you’ll be letting sound in and out for years, and that’s a waste of all the other work you put into sealing the gaps.
Let’s recap, because it’s easy to get overwhelmed: the top three upgrades to make any soundproof enclosure perform better are 1) Seal all gaps with acoustic sealant and grommets, 2) Decouple walls, floor, and ceiling to stop structure-borne vibration, and 3) Use layered barriers and insulation instead of just thicker foam or drywall. These aren’t fancy, expensive hacks—they’re basic acoustics principles that most suppliers skip when building entry-level enclosures, because they add a little time and cost to production. As a supplier, we build all our enclosures with these upgrades as standard, but I know a lot of people already have enclosures they’re trying to get more out of, which is why this guide is so important.
If you’re working with a contractor to build your own enclosure, or you’re looking to upgrade an existing one, these steps will make a bigger difference than any single material choice. And if you’re in the market for a new enclosure that’s built to perform right out of the box, we can walk you through sizing, customization, and the right add-ons for your specific use case—whether that’s a workshop enclosure for woodworking or metal fabrication, a recording studio booth, or an enclosure for testing sensitive electronic equipment. We’ve worked with small hobbyists and major industrial brands, and we don’t sell one-size-fits-all solutions—we tailor each enclosure to what you need it to do, because that’s what makes soundproofing actually work.
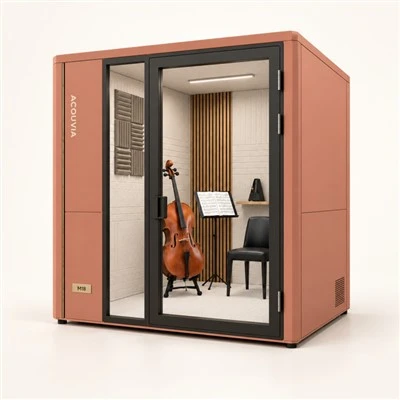
If you’re ready to chat through your specific needs, reach out to us to discuss your project, share your requirements, and find the right soundproof enclosure for you.
Soundproof Enclosure References
Beranek, L. L., & Ver, I. L. (1992). Noise and Vibration Control Engineering: Principles and Applications. Wiley-Interscience.
Fahy, F. J., & Gardonio, P. (2007). Sound and Structural Vibration: Radiation, Transmission and Response. Academic Press.
Olson, H. F. (1957). Acoustical Engineering. D. Van Nostrand Company, Inc.
Harris, C. M. (1998). Handbook of Acoustical Measurements and Noise Control. McGraw-Hill.
Nanjing Huajing Environmental Engineering Co., Ltd.
Nanjing Huajing Environmental Engineering Co., Ltd. is one of the most professional soundproof enclosure manufacturers and suppliers in China, also supports custom service and OEM service. Please feel free to buy durable soundproof enclosure at competitive price from our factory. Welcome to contact us for quotation.
Address: Room 518, No.12 Jinlan Road, Dongshan Subdistrict, Jiangning District, Nanjing City, Jiangsu Province, China
E-mail: contact@hualiving.cn
WebSite: https://www.hjacoustics.com/
